Eclipse is an development environment which will allow the programmers to code in their own projects with ease.This tutorial is to setup and install eclipse onto your computer and configure it with the Android Software Development Kit.Let us break this tutorial into three sections.

- Installing Eclipse.
- Adding Android SDK into eclipse.
- Emulating Android Virtual Device.
Steps to install eclipse on windows :
- Download Eclipse from its official website : Download Eclipse
- Once you download the package open the folder and start the eclipse program.
Adding Android SDK plugins into eclipse :
- Inside the eclipse software go to Help => Eclipse marketplace.
- Search for “Android Adt” in the search bar and install the Android development tools for eclipse provided by google.
- Next inside eclipse go to window =>android sdk manager.
- In the sdk manager select both the tools under “tools” folder and also select the necessary tools under the android packages you need.For example select all the tools under android 4.1.
- Scroll down to the bottom and select the extra tools that you need and finally click on install packages.

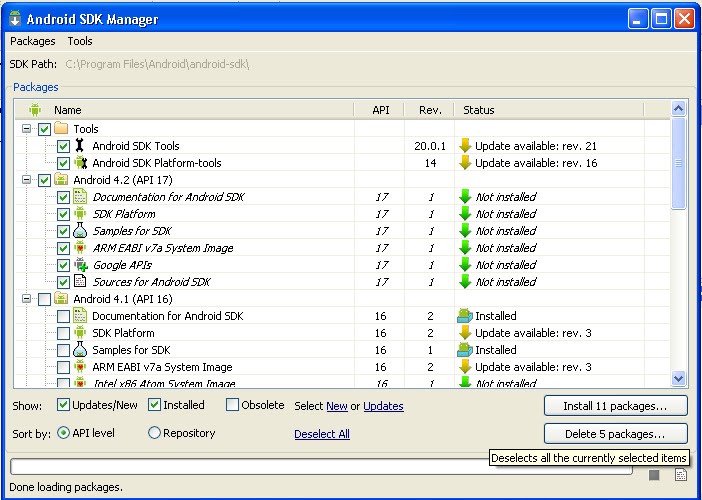
Note : The download process may take very long time based on your internet speed.
If you have downloaded the SDK source from other websites then kindly set the path for android sdk by selecting window => preferences.

Emulating Android Virtual Device :
- Under eclipse go to window => AVD Manager.
- Click on new and type in a name for your device.
- Select the Google API that we have downloaded earlier.
- Leave other things as it is and click on create AVD.

That’s it.Eclipse and Android SDK are ready to be used now.Whenever you write a code for android under eclipse just run it as an Android program and you will see your project in the android virtual device.Some bluetooth function might not work properly in the virtual device.
Learn more about how to Trace mobile number in India.